[EN] DOBISS NXT
Quick-start guide NXT XS DO5521
Installation of the NXT-server
- Connect the Dobiss 4016/2 power supply to the + and – terminals of the NXT server.
- Connect the NXT server (LAN port) to the customer’s router or your own router.
- Connect the CAN bus of the NXT server to the CAN bus of the other modules in the installation. Check that the CAN bus terminating resistors are set to ‘ON’ only on the first and last module!
- Switch on the power supply; the green LED will remain lit continuously and after about 10 seconds the blue LED will start flashing at a hear rate frequency.
Login to the NXT-server
Using a web browser of your choice, go to http://dobiss.local and log in with: Username: dobiss Paswoord: dobiss

If you cannot connect to the NXT via ‘dobiss.local’, search for it using an IP scanner:
e.g. "Advanced IP scanner" software:

e.g. "Fing" app:

After successfully login in, you will be taken to the following page. Here you will see an overview of the various menus. It is advisable to change the password immediately. Until this is done, the message will remain in red.
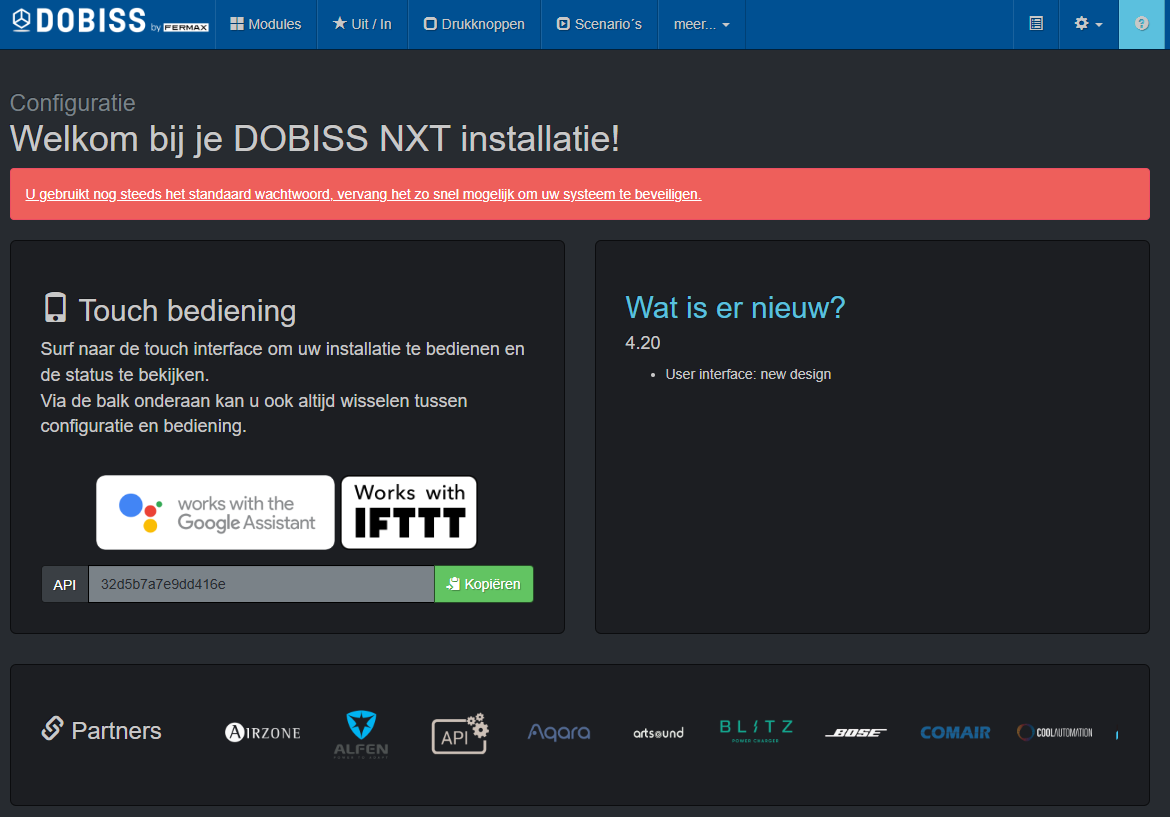

At the bottom of each page, you will see a few icons:
-
 To change the language settings
 -
To switch from the configuration page to the touch layout
-
To log out
Update the NXT with the latest firmware-version
Only possible if the NXT is already connected to the internet!
When starting up the NXT, it is recommended that you first check whether a new firmware version is available.
Go to ‘Modules’; if ‘Upgrade to…’ appears next to ‘NXT Server’, this upgrade must be carried out before proceeding.

Every night or after every restart, the system will check for updates and, if available, this will be indicated.
You can also request instant updates via the blue ‘Download firmware’ button.

General configuration-settings

General settings

- With Cloud Access, you can choose your own name to access the NXT remotely. Enter a name and click ‘Request Name’; it will be activated a few seconds later. This is only possible if the NXT is connected to the internet and the default password has already been changed!
- Project settings, such as saving a backup to your PC/laptop, opening an existing backup and exporting it to the NXT, or starting a new project, can be found under ‘Project’. By default, a cloud backup is saved to the Dobiss cloud server if cloud access has already been activated.
- Under ‘Date / Time & Location’, you can set the correct date, time and location if the NXT is not connected to the internet. If connected to the internet, the NXT server synchronises automatically.
- ‘Local IP address’ displays the local IP address of the NXT server.
- If you wish to convert an existing Ambiance or Evolution PRO installation to an NXT, this can be done via ‘Import from Dobiss PRO’.
- “API” displays the “key” that must be used to enable API integrations.
- In ‘Firmware’, you can choose to download test versions of the NXT (alpha, beta). By default, only the production versions are available.
Users
Creation of personalised logins, each with their own access rights (profiles), for the end user.

Logging
All actions (ins/outs) are logged here and can be viewed.
Configuration modules
Existing PRO to NXT
A PRO installation can be easily upgraded to NXT.
If an upgrade is carried out from an EVOLUTION PRO, the Master Max200 must remain connected to the installation and have at least firmware version 10 installed. If this is not the case, it must first be upgraded via the Ambiance PRO tool using a CAN programmer. If upgrading from an AMBIANCE PRO, the CAN programmer may be removed.
Under ‘General settings’, you can start the import from Dobiss PRO. After importing a PRO installation, all modules are automatically upgraded with the latest NXT firmware (v100 or higher) and will appear under ‘Modules’.
All modules, groups, names and configurations of outputs, as well as the names and configurations of buttons and scenes, are transferred from PRO.
Setting up a new installation
When setting up a new installation, start by addressing the modules via ‘Start addressing’. All modules connected to the CAN bus will now begin to flash more slowly.

One by one, the ‘Service’ button on the modules must be pressed briefly once, and the various modules will appear in the list in the order in which they were pressed, grouped by type.

Modules that already have the NXT firmware installed arrive with v100 (or higher). Modules with the PRO firmware arrive with v22 (or lower).

PRO modules addressed by the NXT are automatically upgraded to the NXT version. The status of the firmware upgrade is displayed in blue at the bottom of the page.

- Flash behaviour of PRO modules: rapidly flashing green LED
- Flash behaviour of NXT modules: green LED flashes at heart rate frequency.
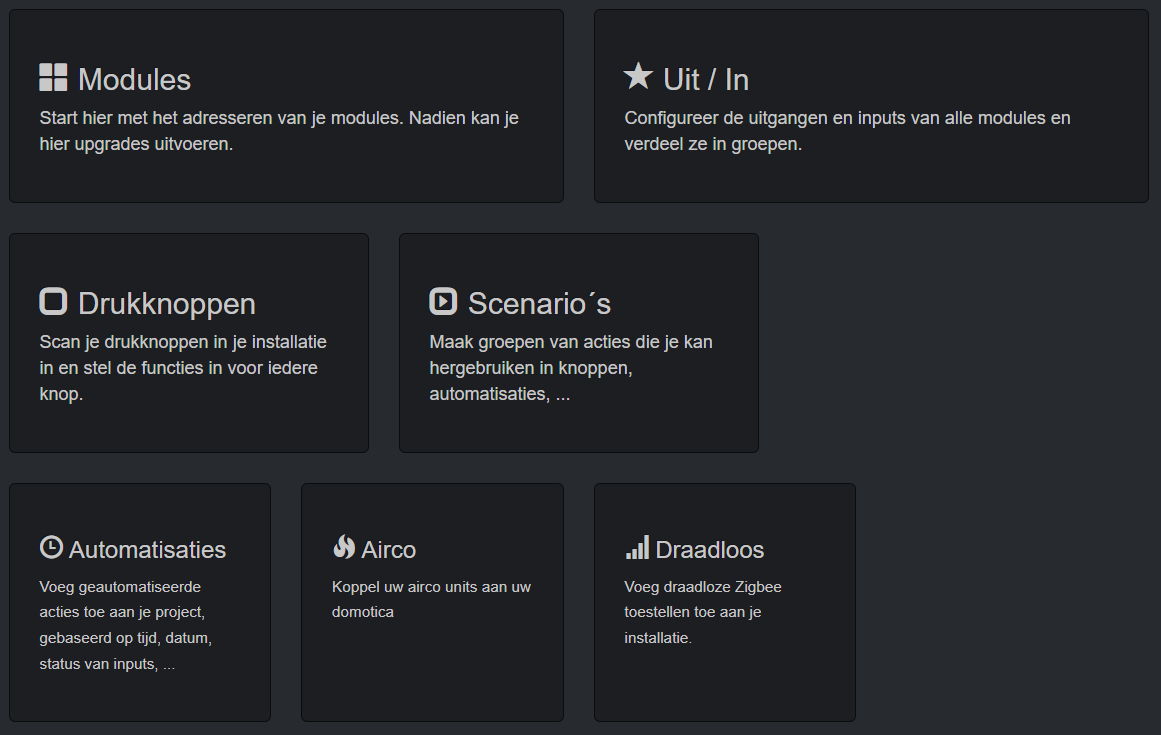
Overview of further configuration

- Inputs/Outputs: configuration of inputs and outputs, naming, creating groups, etc.
- Push buttons: scanning push buttons, assigning actions to buttons, etc.
- Scenarios: configuration of scenarios/moods.
- Automations: creating schedules based on time, sunrise and sunset, etc.
- Airco: Integration with leading air conditioning manufacturers via the Airzone, Intesis or Coolmaster interface.
- Wireless: Integration with numerous wireless devices via Zigbee.
- ?: Link to the support site for more information about the NXT and possible integrations
All changes are always sent automatically to the modules; you can find the export status at the bottom of every page in blue!
Video tutorials
Use the button ![]() on the top right of the video to see all tutorials.
on the top right of the video to see all tutorials.
Download
Archive with all videos for offline usage.
View online
- Login to NXT server
- Modules
- Outputs
- Push buttons
- Scenarios
- Automations
- Global settings
- Heating/cooling
- Link with Google Home/Assistant
- Audio
- Flags
- Notifications
- IFTTT
- FERMAX MEET
- Zigbee
- Linking Zigbee gateway with Dobiss NXT
- Integration of Dobiss Zigbee relay into Dobiss NXT
- Integration of Dobiss Zigbee dual relay into Dobiss NXT
- Integration of Dobiss Zigbee dimmer into Dobiss NXT
- Integration of Dobiss ZIgbee curtain control in Dobiss NXT
- Integration of Dobiss Zigbee 4 fold push button into Dobiss NXT
Qmotion integration
For this integration the NXT server should be upgraded to alpha version 3.40-6. Go to Global settings and change the Firmware to 'alpha'. Then proceed to the modules page and start a new download of the firmware. Once the download is finished, you can install the latest alpha version.
This page describes how to integrate Qmotion shades that are installed through wired RS485 with a Dobiss NXT installation.
Moxa gateway
Model: Nport 5150
Network settings
- Set the gateway on a fixed IP address
The Dobiss NXT server and the Moxa gateway need to be installed on the same local network.

Serial settings

Operation settings
Following parameters in the screenshot need to be adapted:
* Max connection: 4
* Ignore jammed IP: Yes

Qmotion
Collect the shade identifiers by scanning the QR code on the devices. The ID starts with 000D
Dobiss integration
- Go to Configuration > Partners > Wireless > Qmotion
- Fill out the IP address
- Add a shade or group via the + button
- Give the shade a name, fill in the ID (000D… or a number for a group) and choose the type (shade or group)

- Once all shades and groups are added, go to the Out/In page of the configuration to order them into groups. You will find your shades and groups in the list of ‘Zigbee outputs’:

- If you add the shade/group to a Dobiss group, it will be visible in the Touch UI:

- When the shade is controlled manually, from a group or by another remote; the status will be updated in Dobiss after a few seconds.
The status polling is done for the moment for each shade individually, but polling of group 0 might speed up this process.